
How to Create a Realistic Gold Effect in Figma — No Plugins. No Textures. 100% Vector.
Gold is one of the hardest things to fake in digital design. Most designers reach for a photo texture, a free Figma plugin, or a pre-made asset — and the result always looks slightly off. Either too warm, too flat, or too orange. I spent a long time experimenting until I found a pure vector approach that produces genuinely convincing metallic gold inside Figma — scalable to any size, editable at any time, with zero dependencies.
This is the exact technique I use in client branding projects, UI badges, and premium logo mockups. By the end of this tutorial, you’ll have a reusable gold style you can apply to any shape, text, or icon in your Figma file.
| Hex Code | Tone |
|---|---|
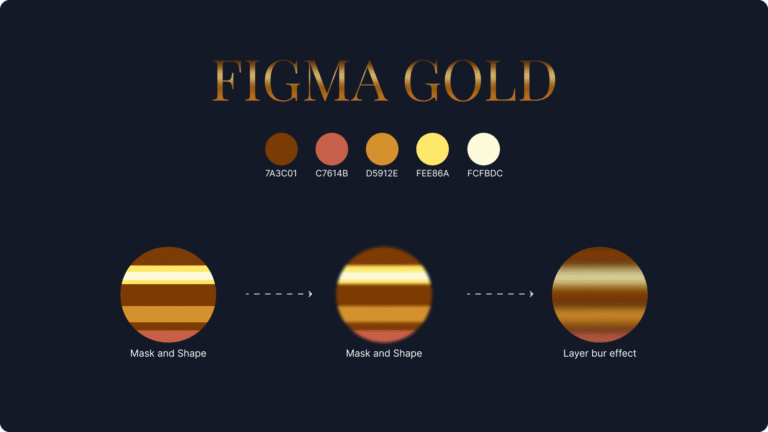
|
#7A3C01 |
Deep Bronze |
|
#C7614B |
Burnt Copper |
|
#D5912E |
Antique Gold |
|
#FEE86A |
Light Gold |
|
#FCFBDC |
Soft Highlight |
🌀 Why This Method Works Better
| Old Texture Method | Figma Gold Method |
|---|---|
|
Non-scalable raster |
100% vector-based |
|
Heavy download size |
Lightweight file |
|
Hard to edit colors |
Easy customization |
|
Flat & pixelated |
Smooth shiny effect |
Want the source .fig file with reusable gold styles and gradients? Just drop a message: "Send Figma file"
Add 5–7 numbered steps: (1) Create a shape in Figma, (2) Apply the base gradient, (3) Layer the highlight, (4) Add the masking technique, (5) Final adjustments. Include screenshots or a Loom video link. This turns a thin page into a genuinely useful tutorial that ranks for “Figma gold effect tutorial”.